How to Wash a Bike
The order to do it in, the two places where water and degreaser do real damage, and why the last five minutes matter more than the first twenty.
How this is funded: we earn a commission if you buy through our links, at no extra cost to you. It never changes which bike we recommend, and we will tell you plainly when we would skip one. Full disclosure.
Washing a bike is not complicated, but the order matters and two of the steps can do real damage if you get them wrong. The short version: frame first, drivetrain second, brakes never— and the last five minutes, drying and re-lubing, are what decide whether the wash helped or hurt.
You do not need a stand, a pressure washer or a shelf of specialist sprays. You need a bucket of warm soapy water, a brush, a degreaser for the chain, a rag and chain lube. Everything else on the shelf at a bike shop is convenience.
What you need
- Warm water and a little dish soap in a bucket. Not a pressure washer. More on why below, because this is the mistake that costs money.
- A soft brush and a rag or two. An old dish brush works. A bottle brush gets between the cassette sprockets.
- A degreaser for the chain and cassette only. Dish soap does not shift chain grime, which is oil holding grit.
- Chain lube— wet or dry, matched to your conditions. This is not optional: it is the step that makes the wash worth doing.
Two things to skip: a pressure washer, and any aerosol “quick clean” spray used near disc brakes. Both cause the two failure modes in this guide.
The order that works
- Rinse, gently. Hose on low, or water poured from a jug. Enough to float the loose grit off so your brush is not grinding it into the paint.
- Soapy water on the frame and wheels.Top down: bars, saddle, frame, fork, wheels last. Rims get their own pass if you have rim brakes — that braking surface is where pad material builds up.
- Drivetrain, separately. Degreaser on the chain, cassette, chainrings and derailleur jockey wheels. Use the brush and keep it out of the wheel bearings. If the chain is visibly black, a chain scrubber tool does the job properly in one pass.
- Rinse again, lightly. You are rinsing soap and degreaser off, not blasting. Aim water down and away from the hubs, bottom bracket and headset rather than into them.
- Dry. Towel the frame. Bounce the bike gently on its wheels to shake water out of the rims and spokes. Give it air, not a closed shed.
- Re-lube the chain. One drop per roller, pedal backwards a dozen turns, then wipe the outside of the chain dry with a rag. Lube belongs inside the rollers; what is left on the outside only collects grit.
The two things that cause real damage
1. Water where the grease lives
Covered above, and worth repeating because it is invisible. Low pressure, aim away from bearings, and do not hold a jet anywhere near a hub, the bottom bracket shell or the headset.
2. Degreaser on the brakes
If you have disc brakes, oil or degreaser on the rotor or pads is the one mistake you cannot wash out. Contaminated pads squeal, lose power and usually need replacing rather than cleaning. Spray degreaser onto a rag and apply it from there, and if you are cleaning near the rotor, hold a piece of card behind it. What worn and contaminated pads look like.
With rim brakes the risk is smaller but the rule is the same: keep degreaser and lube off the braking surface of the rim, and wipe that surface clean with plain soapy water instead. How to set the pads once the rim is clean.
What to buy, and in what order
You need two things: something to clean the drivetrain and something to lubricate it afterwards. A kit bundles both and costs less than buying them separately, which is why the kits are first here. The lubes are the refills — the thing you will buy again.
What each one publishes, taken from the listings themselves rather than from the marketing on the bottle:
| Product | What is in the box | Published volume | Lube type |
|---|---|---|---|
| Finish Line Pro Chain Cleaner Kit | Chain scrubber, degreaser, chain lubricant | Degreaser described as EcoTech biodegradable; volume not published | Dry-style |
| Ultrafashs 7-Piece Bike Cleaning Kit | Degreaser, lube, scrubber, brush, gloves, scraper, gear floss | 10 oz degreaser, 2 oz lube | Wet-style |
| Finish Line Wet Lubricant | Lubricant only, 4 oz | 4 oz | Wet-style, for rain and winter roads |
| Muc-Off Bio Dry Lube | Lubricant only, 4.06 fl oz | 4.06 fl oz, biodegradable | Wax-based dry, for dry and dusty |
What this job needs
Two kits that cover the whole drivetrain job, and the two lubes to match your conditions. Prices are live; a kit is cheaper than buying the degreaser and lube separately.
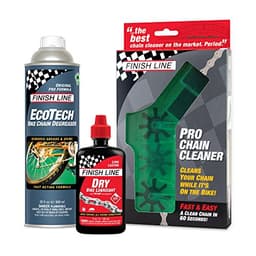
Finish Line Pro Chain Cleaner Kit
The whole chain job in one box: scrubber, degreaser and a dry-style lube. Buy this one if you are starting from nothing.
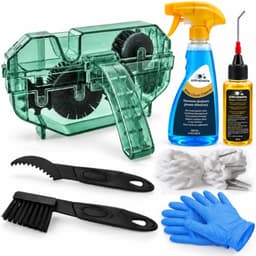
Ultrafashs 7-Piece Bike Cleaning Kit
Seven pieces including the gear floss and scraper that make a cassette properly clean rather than wiped, with a wet-style lube for winter.
$19.99 · View on AmazonPrice as of October 21, 2026. #ad How we’re funded
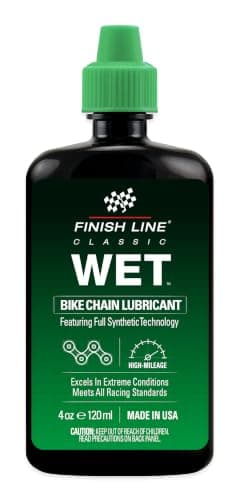
Finish Line Wet Bike Chain Lubricant 4 oz
The refill for rain, slush and salted winter roads, where a dry lube washes straight off.
$11.91 · View on AmazonPrice as of October 21, 2026. #ad How we’re funded
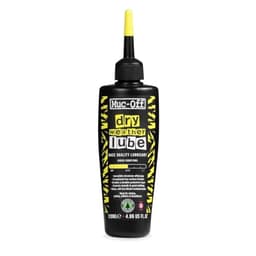
Muc-Off Bio Dry Chain Lube
The refill for dry and dusty riding, where a wet lube turns into grinding paste.
We have not ridden or tested these — every specification comes from the manufacturer or the retailer listing, dated. Here is exactly what we do instead.
How often is this actually worth doing
- Every two or three dry rides: wipe the chain with a rag and add a drop of lube per roller. Two minutes, and it is most of the benefit.
- After every wet or muddy ride: rinse, dry, re-lube. Skip the full degrease unless the chain is black.
- After a ride on salted roads: wash the same day. Salt keeps working on steel and aluminum long after the bike is dry.
- Monthly, if you ride regularly: the full version above, including the drivetrain degrease.
If the salt or the winter got there first and there is orange on the chain and the bolts, removing rust from a bike covers which parts actually rust, which only look like it, and the household methods we will not recommend.
One thing a wash will not fix: a worn chain. Chains stretch as they wear and a stretched chain chews the cassette, so the useful check is wear rather than cleanliness. How to tell when a chain is finished and the tool that measures it.
And if the bike lives outside, the wash is only half the problem — where you keep it does more damage or more good than anything in this guide.
Questions people actually ask
How often should I wash my bike?
Wipe the chain and re-lube every two or three rides in the dry, and after any wet or muddy ride. A full wash is worth doing monthly if you ride regularly, or immediately after a ride in salt, mud or heavy rain. Salt is the one that cannot wait.
Can I use a pressure washer on a bike?
No. A pressure washer forces water past the seals in the hubs, bottom bracket and headset, where it displaces grease and starts corrosion you will not see until the bearings feel rough. A bucket, a hose on low pressure or a watering can does the same job without the damage.
Can I use dish soap on a bike?
On the frame and wheels, yes -- warm water with a little dish soap is fine. Keep it off the chain and cassette, where you want a degreaser that rinses cleanly, and off disc rotors and pads entirely.
What should I never get degreaser on?
Disc brake rotors and pads. Contaminated pads squeal, lose power and often cannot be recovered by cleaning -- they need replacing. Spray degreaser onto a rag rather than at the bike, and cover the rotor if you are working near it.
Do I have to re-lube the chain after washing?
Yes, every time. Washing removes lubricant along with the grit, and a dry chain wears itself, the cassette and the chainrings far faster than a dirty one. Re-lube while the chain is dry, not while it is still wet.
Wet lube or dry lube?
Dry lube for dry, dusty conditions -- it attracts less grit. Wet lube for rain, slush and winter roads, where a dry lube washes off. If you only buy one and you ride year-round, buy wet and clean the chain more often.
How do I dry a bike so it does not rust?
Towel the frame, then bounce the bike gently on its wheels to shed water from the rims and spokes, and leave it somewhere with moving air rather than in a closed shed. Chain rust forms within hours on a wet chain, which is why re-lubing is part of washing rather than a separate job.
Sources
Specifications come from the manufacturer or the retailer listing, dated. Where a figure is not published, we say so rather than estimating it.
- Park Tool — How to clean and lubricate a chain — Manufacturer procedure for degreasing, drying and re-lubricating a bicycle chain (accessed August 11, 2026)
- Park Tool — When to replace a worn chain — The 0.5% / 0.75% / 1.0% chain-wear replacement thresholds and the ruler method for measuring them (accessed August 11, 2026)
- Park Tool — Disc brake pad removal and installation — The published replacement threshold - pad material should measure at least 1 mm thick - plus the compound comparison: organic gives the best initial bite and the best rotor longevity but the poorest wet durability, semi-metallic sits in the middle, and metallic lasts longest in the dry while generating more noise. Also the contamination test: a darkness on the rotor and pads that smears when rubbed with a finger (accessed September 5, 2026)
- Park Tool — Brake pad replacement, rim brakes — The three rim brake pad systems (road, threaded stud, smooth stud), the rule that a holder's closed side always faces forward, the guidance that the caliper arm should be close to vertical as the pad strikes the rim, and the point that pad material hardens with age as well as wearing thin (accessed September 5, 2026)
Read next
How to Clean a Bike Chain
The drivetrain half of this job in detail, including when a degrease is overkill.
Read the guideBike Maintenance for Beginners
The short list of jobs worth learning, in the order they come up.
Read the guideBest Bike Chain Lube
Wet, dry and ceramic compared, with what each is actually for.
See the lube picksCycling in the Rain
What a wet ride does to a bike, and the ten minutes afterwards that prevent most of it.
Read the guide