The first six: buy before your first ride
1. A helmet
Non-negotiable. Every helmet sold in the US meets the same federal impact and strap-retention standard, so a cheap certified helmet that fits is safer than an expensive one that does not. The one feature worth paying up for is a rotational protection layer such as MIPS. Full comparison of six helmets here.
2. A floor pump with a gauge
The most under-rated purchase on this list. Road and gravel tires lose pressure every few days, and riding on soft tires is slow, uncomfortable and the leading cause of punctures.
It must have a gauge, and it must handle Presta valves— the narrow ones with a small threaded nut at the tip, standard on road and gravel bikes. A car-style pump will not fit. A mini pump is for emergencies on the road, not for setting pressure at home.
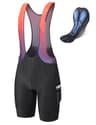
3. Padded shorts
The single most effective comfort purchase available. Most people who conclude cycling is uncomfortable have simply never worn a pair.
One rule: no underwear underneath. The pad sits directly against skin, and underwear reintroduces exactly the seams the pad exists to remove. The bibs-versus-waist decision is covered here.
4. Front and rear lights
Legally required in most places after dark, and worth running in daylight too — a flashing rear light makes you visible far earlier to a driver. USB rechargeable means never discovering the batteries are dead.
Note the limit: these lights make you seen. They do not light an unlit road ahead of you, and if you ride dark lanes at speed you need a much brighter front light.
5. A spare inner tube
The difference between a puncture being a ten-minute stop and a two-hour walk. Buy two: one to carry, one at home for when you have used the first.
Check the size matches your tires. A tube for 700x28-38 will not safely stretch to a 44mm tire. The size is printed on your tire sidewall.
6. Tire levers
You cannot get a tire off a rim with your fingers. Two or three plastic levers cost almost nothing and are the tool that makes the spare tube usable. Park Tool’s blue ones are what every shop uses, and they do not snap on a tight tire the way free ones do.
The next three: within the first month
7. A multi-tool
Bolts work loose, saddles need adjusting, and a dropped chain occasionally needs a chain tool. A good multi-tool lives permanently in a saddle bag and gets you home. A cheap one rounds off a bolt head, which costs far more than the tool saved.
8. A mini pump or CO2 inflator
A spare tube is useless without a way to inflate it. A combined hand pump and CO2 inflator does both jobs: the cartridge when you are cold and want to get moving, the hand pump when the cartridge is spent.
CO2 cartridges are usually sold separately— the ROCKBROS listing says so, which is more honest than most. And CO2 leaks out of a tube faster than air does, so re-inflate properly with your floor pump when you get home.
9. A saddle bag
Not for the bag. For the fact that the tube, levers and multi-tool live in it permanently, so you cannot forget them. Everyone who carries tools in a jersey pocket eventually rides without them on the day they need them.
The last three: nice, cheap, get them eventually
10 and 11. A bottle cage and a bottle
Almost every drop-bar frame has two threaded holes for a cage, and a surprising number of new riders never use them. Dehydration on a warm ride makes you feel terrible in a way that is easy to mistake for being unfit.
A proper cycling bottle with a self-sealing valve lets you drink one-handed at speed without taking your eyes off the road, which is the whole reason it costs more than a supermarket bottle.
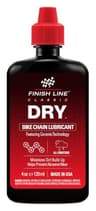
12. Chain lube
The cheapest thing you can do to make a budget drivetrain shift well and last. A dry chain wears the sprockets, and a worn cassette turns a $30 chain replacement into a $120 drivetrain replacement.
Use dry lube for dry and dusty conditions (most gravel riding) because it does not attract grit, and wet lube if you ride through sustained rain. Apply one drop per link on a clean chain, leave it a few minutes, then wipe the outside off — lube belongs inside the rollers, not on the surface collecting dirt.
What to skip, at least for now
- A bike computer. Your phone records rides for free and better. Buy one when you want the numbers on the handlebars rather than in your pocket.
- Clip-in shoes and pedals. Genuinely useful, and not in month one. The pedals page explains when to revisit it.
- A bike lock, if the bike lives indoors. A good lock is heavy and expensive. If you never leave the bike in public, that is weight and money spent on a risk you are not taking.
- Anything carbon. Carbon bottle cages, carbon bars. On a first setup this is pure cost.
- A turbo trainer. Buy it in November if you are still riding then. Buying one in July is how you find out you did not want one.
The budget, summarized
- The first six items: roughly $150 to $200. Buy before your first ride.
- Items 7 to 9: roughly $70 to $90. Within the first month.
- Items 10 to 12: roughly $30 to $40. Whenever.
Call it $250 to $330 for the complete kit, or about 40% on top of a $700 bike. The full out-the-door arithmetic, including the shop build, is on what a beginner bike really costs.
And if the budget is tight: buy a cheaper bike and this whole list. A $600 bike with proper kit is a far better setup than an $850 bike with none. It is not close.
This page is about what to buy alongside the bike. Once you have ridden it a few months and start wondering what to change on it, the upgrade hub picks up there — tires first, and not the gears.
Buying this list for someone else? The same twelve things, re-sorted for a gifter who does not ride, are on the gifts-for-a-new-cyclist page. And if you are assembling the kit in the autumn: none of it is worth waiting for Black Friday — here is what actually goes on sale in November, and it is not the pump.