How to Set Up Tubeless Tires
The conversion, start to finish: what you need, what actually seals a tire, and the two failure points that make first attempts take three hours instead of one.
How this is funded: we earn a commission if you buy through our links, at no extra cost to you. It never changes which bike we recommend, and we will tell you plainly when we would skip one. Full disclosure.
Going tubeless means removing the inner tube and letting the tire seal directly against the rim, with a liquid sealant inside that plugs small holes as they happen. It works, it is genuinely worthwhile on gravel, and the first attempt takes most people an entire afternoon.
This guide is the order to do it in, and the specific points where first attempts go wrong. If you have not decided yet, read the comparison first — this is a job, not an upgrade you unwrap.
Step 0: check your wheels and tires are actually tubeless-ready
Park Tool publish a compatibility article because this is where the money gets wasted. Check the manufacturer’s description of your wheels and tires for “tubeless ready”, “TCS”, “TLR” or “TR”. If neither says anything, the honest answer is that this project is not for your current wheels.
If the rims turn out not to be tubeless-ready, that is one of the few genuinely good reasons to buy a wheelset — it is a capability you cannot add any other way. Whether a wheel upgrade is worth it covers that case alongside the compatibility checks to run before you order anything.
Step 1: gather everything before you start
- Tubeless rim tape in the correct width for your rim, unless the wheels came taped from the factory.
- Tubeless valves long enough for your rim depth, with removable cores.
- Sealant and a measuring cup.
- A valve core remover — usually built into the valve cap or included with the valves.
- An air source that moves volume fast: a compressor, a floor pump with a charging chamber, or a CO2 cartridge.
- Soapy water in a spray bottle and rags. It will be messier than you expect.
Step 2: tape the rim
Remove the tire, tube and any old tape, and clean the rim bed with a rag — tape does not stick to a greasy rim.
Start the tape opposite the valve hole and wrap under tension, keeping it centered, so it sits flat with no bubbles and covers the spoke holes completely. Go around once and overlap the start by a few inches. Then pierce a small hole at the valve.
Tape is the number one cause of a tubeless setup that holds air for an hour and then does not. If in doubt, do it again properly.
Step 3: valve in, tire on, sealant in
- Fit the valve through the taped hole and tighten the lock ring firmly by hand. Not with pliers.
- Fit one bead of the tire completely, and the second bead most of the way, checking any rotation arrow on the sidewall.
- Add sealant. Park Tool describe two methods: pour the measured dose into the tire through the gap before closing the last section of bead, or seat the tire first, remove the valve core, and inject the sealant through the valve. The second is cleaner and it is the one to use once you own an injector.
- Close the last of the bead with your thumbs, working from opposite the valve toward it.
Step 4: seat the bead
This is the loud part. Take the valve core out so air enters unrestricted, spray soapy water around both beads, and hit it with the compressor or charger pump. You are listening for two sharp pops as each bead snaps into the rim lock.
Once it is seated, screw the core back in, inflate to your riding pressure, and rotate the wheel to spread the sealant around the inside. Leave it overnight, then check the pressure in the morning.
When it will not seat
Every one of these is normal and none of them mean the setup is wrong:
- Air escapes as fast as it goes in. Remove the valve core if you have not, and add more soapy water. Surface tension genuinely helps the bead slide.
- The tire is still folded from the box. Fit a tube, inflate it, leave it overnight, then remove the tube. The casing takes its round shape back.
- A hand pump will not do it. Often true, and not a fault in your technique — the volume of air per stroke is simply too low. Park Tool list a compressor as recommended equipment for this job.
- It seats and then goes soft overnight. Usually the tape. Sometimes sealant needs a couple of rides to find the pinholes in a new tire.
What the conversion needs
Two consumables you cannot do this without, and the pump that decides whether the bead seats on the first attempt or the fifth.
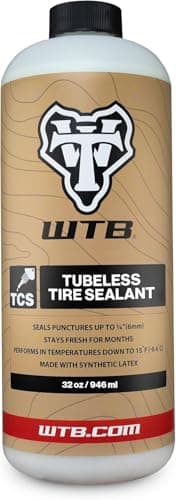
WTB TCS Tubeless Sealant 32 oz
A 32oz bottle covers several fills, which is what you need - sealant dries out and gets topped up two or three times a year.
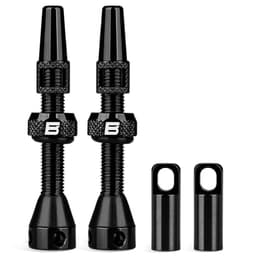
BWSHLF Tubeless Presta Valve Stems (pair)
Removable-core valves in seven published lengths, with the core remover in the box. The part people forget to order.
$15.99 · View on AmazonPrice as of October 21, 2026. #ad How we’re funded
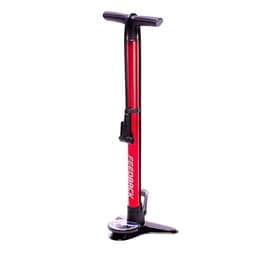
Feedback Sports Pneuma CC
A charger pump stores a burst of air and releases it at once, which is what seats a stubborn bead without a compressor.
We have not ridden or tested these — every specification comes from the manufacturer or the retailer listing, dated. Here is exactly what we do instead.
Living with it
Tubeless is not fit-and-forget. Three habits keep it working:
- Check pressure before every ride. Tubeless tires lose air faster than tubes do, and low pressure is what burps a tire off the rim in a corner.
- Top up the sealant every few months. Dried sealant seals nothing. WTB publish a low-temperature limit of 15°F for their sealant, which is a useful reminder that this is a chemical product with conditions, not a permanent fix.
- Still carry a tube. A gash too big to seal is fitted with a tube at the roadside, exactly as before — and the flat repair is the same job, with more mess.
And once it is set up, the reason you did it is pressure: tubeless lets you run lower pressures without pinch flats, and that is where the grip and comfort come from. Work out your numbers rather than guessing.
Questions people actually ask
What do I need to set up tubeless tires?
Tubeless-ready rims and tires, tubeless rim tape if the wheels did not come taped, a pair of tubeless valves, sealant, and a way to move a lot of air at once - a compressor, a charger pump or a CO2 cartridge. Park Tool's published procedure also lists a valve core remover, a measuring cup for the sealant and soapy water for tight beads. A standard floor pump alone will often not seat a bead.
Can any wheel be converted to tubeless?
No. The rim has to be designed for it - tubeless-ready rims have a bead lock and a profile that holds the tire against the rim wall when it loses pressure. Park Tool publish a compatibility article for exactly this reason. Some non-tubeless rims can be converted with conversion kits, but on a budget wheelset the safest answer is: if the manufacturer does not call it tubeless-ready, do not.
How much sealant does a tubeless tire need?
Follow the sealant manufacturer's label - it is printed on the bottle and it varies by brand and tire size. Broadly, a gravel tire takes more than a road tire because it has more volume, and a bigger dose seals bigger holes but adds weight and takes longer to dry out. Park Tool's procedure has you measure it into a cup rather than eyeball it, which is worth doing.
How often does tubeless sealant need topping up?
Every few months for most riders, and sooner in hot dry climates. Sealant works by being liquid, and it dries out - a tire with dried sealant in it is a tubeless tire with no puncture protection at all. The check is simple: unseat one side of the bead and look, or shake the wheel and listen for liquid moving. Top up rather than adding indefinitely, and clean out the dried skin when you change tires.
Why will my tubeless tire not inflate?
Almost always because air is escaping faster than your pump delivers it. The fixes in order: remove the valve core so air goes in unrestricted, use soapy water around the bead so it slides into place, use a compressor or charger pump rather than a hand pump, and if the tire has been folded in a box, fit a tube first and leave it inflated overnight to give the bead its shape back.
Is tubeless worth it for a beginner?
It is worth it if you ride rough or thorny ground at low pressures, and it is a lot of faff if you ride mostly tarmac. The real gain is that small punctures seal themselves while you keep riding, and that you can run lower pressures without pinch flats. The real cost is setup time, sealant that needs replacing, and a messier roadside repair on the occasions when it does not seal.
Sources
Specifications come from the manufacturer or the retailer listing, dated. Where a figure is not published, we say so rather than estimating it.
- Park Tool — Tubeless tire removal and installation — Published tubeless procedure, including the tool list: compressor or charger pump, valve core remover, measuring cup, soapy water for tight beads (accessed August 18, 2026)
- Park Tool — Tubeless tire compatibility — Which rim and tire combinations are designed to run without a tube, and why a non-tubeless rim is not a candidate (accessed August 18, 2026)
- WTB — Frequently asked questions — WTB's own tire pressure guidance for high-volume gravel tires (accessed July 23, 2026)
- Silca — Professional tire pressure calculator — Published pressure model taking rider weight, tire width and surface as inputs (accessed July 23, 2026)
Read next
Tubeless vs Inner Tubes
Whether to do this at all, argued honestly both ways.
Read the comparisonBest Gravel Bike Tires
Which tires are tubeless-ready, with live prices.
See the picksBest Bike Floor Pumps
Charger pumps and inflators - the tool that makes this job possible.
See the pump picksGravel Bike Tire Pressure
The pressures that make a tubeless setup worth having.
Read the guide