Gravel Bike Handlebars Explained
Width, flare, reach and drop in plain English, how to work out what is on your bike now, and the one measurement that stops a new bar being an expensive mistake.
How this is funded: we earn a commission if you buy through our links, at no extra cost to you. It never changes which bike we recommend, and we will tell you plainly when we would skip one. Full disclosure.
A gravel handlebar looks like a road bar that has been bent outward at the bottom, and that is roughly what it is. The listing for a bar will quote four numbers — width, flare, reach and drop — and none of them means anything until you know where on the bar it is measured. This page explains the four, tells you what is probably on your bike already, and then explains the one thing you must measure before ordering a replacement.
The four numbers
Width is the distance across the bar, and it is the one to be careful with, because different makers measure it in different places. Salsa quote their Cowchipper widths “measured at the hoods”; on a flared bar the drops are wider than that, which is why Ritchey note that gravel bars are often listed with two widths. Read the small print before you compare two bars.
Flare is the angle at which the drops splay outward. Ritchey put it simply: “by flaring the bars in the drops, the total bar width increases based on the degree of flare,” and the wider your hands are in the drops, the more control you have on rough ground. Their own bars run from a “subtle 12°” to a “sweeping 27.5°”; Salsa’s Cowchipper, one of the most common gravel bars, is 24°.
Reach, in Ritchey’s definition, is “the distance in millimeters from the center of the bar clamp to the end of the bar where your hoods would be.” Shorter reach brings the hoods closer to you.
Drop is “the distance in millimeters from the center of the bar’s top to the lowest point in the center of the drops.” A shallower drop makes the low position less extreme. The Cowchipper publishes 116mm of drop and 68mm of reach, which is short and shallow by road standards, and that combination is the point: gravel bars are designed so that a normal person can actually use the drops on a descent.
What is probably on your bike now
An entry-level gravel bike ships with an aluminum bar the manufacturer chose for the frame size, with a modest flare and a shallow drop. The Amazon listings for the bikes on our gravel page publish none of the four numbers, which is normal; you find them by looking under the bar tape near the stem, where most bars have the width and clamp size printed.
The good news is that the stock bar is almost never the problem. Numb hands, a sore neck and aching shoulders on a new bike are nearly always saddle height, reach or stem length, and the fit guide fixes those for free. Change the bar only when the fit is right and a specific complaint remains.
How to choose a width
The old road rule was to match your shoulder width at the hoods, and it is still a reasonable starting point. Gravel bars are sold in a wide range — the Cowchipper runs from 38cm to 52cm in 2cm steps — and the trend is toward wider than the road rule, because Salsa’s own experience with their widest sizes is that “the added control is noticeable right away” and the width “makes the move from mountain bike to drop-bar bike more instinctive.”
Two honest cautions. First, wider bars are slower into a headwind and can make the front of a small frame feel like a shopping cart. Second, a wider bar often needs longer brake and gear cables, which turns a simple swap into a shop job. Go one size wider than stock if you go at all, not three.
How much flare you actually want
More flare helps in the drops on rough descents and almost nowhere else. If you ride the hoods all the time — most beginners do — the flare of your bar is close to irrelevant, and the bars with the biggest numbers put the brake levers at an angle that some people find awkward on the hoods. A modest flare in the teens or low twenties is the right answer until you find yourself wanting more on a specific descent.
The one measurement before you buy a new bar
Clamp diameter. Park Tool’s installation guide is blunt: “it is also important that the bar diameter and the stem clamp diameter are the same,” and you should “measure right where the stem will clamp using a metric caliper” because “some clamp diameters are within fractions of a millimeter of each other and are not cross-compatible.” Modern drop bars are mostly 31.8mm — the Cowchipper is — but older and cheaper bikes can be 25.4mm or 26.0mm, and a 26.0mm bar in a 25.4mm stem is a crash waiting to happen.
Park Tool also note that the stem’s clamp size is “typically engraved or labeled on the stem, but sometimes it is not.” If it is not, measure the bar you are removing rather than guessing.
What a bar swap actually involves
More than the listing suggests. Following Park Tool’s sequence, you photograph the current lever positions, unwrap the tape, remove the brake levers from the old bar, fit them to the new one, set the bar roll and lever position identically on both sides, torque the stem faceplate to the printed figure, and then re-wrap. The torque step is not optional — a handlebar that slips under braking is the failure mode — and the re-wrap means a new roll of tape every time.
That is why the picks below are tape and a torque wrench rather than a handlebar. We do not stock a bar in the registry, and we would not recommend one without knowing your clamp size and stem; what every bar swap needs regardless is the wrap and the wrench.
What a handlebar change needs regardless of the bar
Every swap ends with a re-wrap and a torqued stem bolt. Three registry picks with live prices that cover both.
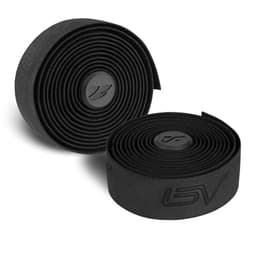
BV EVA Foam Handlebar Tape
Two rolls, plugs and finishing tape for very little. The right first tape to learn wrapping on, because ruining a roll costs nothing.
$9.99 · View on AmazonPrice as of September 20, 2026. #ad How we’re funded
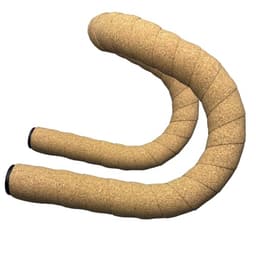
TIANXON Cork Handlebar Tape
About 2.8mm thick and cork-surfaced, which is the answer if the reason you are changing bars is buzzing hands on gravel.
$12.99 · View on AmazonPrice as of September 20, 2026. #ad How we’re funded
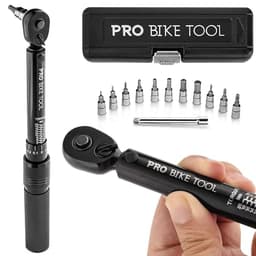
PRO BIKE TOOL Torque Wrench Set
Stem faceplate bolts have a printed torque figure for a reason. The 2.2-16.9 Nm range covers every bolt in a bar swap.
$59.99 · View on AmazonPrice as of September 20, 2026. #ad How we’re funded
We have not ridden or tested these — every specification comes from the manufacturer or the retailer listing, dated. Here is exactly what we do instead.
The honest summary
For a first gravel bike, the bar that came on it is fine. Get the fit right, wrap it in tape you like, and ride it for a season. If after that you still want your hands wider in the drops on descents, buy a bar one size wider with a flare in the twenties, check the clamp size with a caliper first, and budget for tape, possibly cables, and an hour with a torque wrench. The budget upgrades page puts the handlebar in context against the changes that matter more.
Questions people actually ask
What width handlebars should I get for a gravel bike?
Start from what came on the bike, which the manufacturer chose to match the frame size, and only change it if you have a reason: hands feeling cramped on the hoods suggests wider, shoulders aching on long rides suggests narrower. Gravel bars are sold from about 38cm to 52cm - Salsa's Cowchipper covers exactly that range - and the width is usually quoted at the hoods, with the drops wider because of the flare.
What is handlebar flare on a gravel bike?
The angle at which the drops splay outward from vertical. Ritchey's own guide explains that flaring the drops increases the total bar width, which is why gravel bars list two widths - one at the hoods, one at the ends. Flare puts your hands wider and your wrists at a more natural angle when you are in the drops on rough ground. Ritchey's bars run from a subtle 12 degrees to 27.5; Salsa's Cowchipper is 24.
What do reach and drop mean on a handlebar?
Ritchey define reach as the distance from the center of the bar clamp to where the hoods sit, and drop as the distance from the center of the bar's top to the lowest point of the drops. A shorter reach and a shallower drop - the norm on gravel bars - make the drops usable for a beginner rather than a position you never use.
Can I put wider handlebars on my gravel bike?
Yes, provided the new bar's clamp diameter matches your stem. Park Tool's procedure is explicit that the two must be the same and should be measured with a caliper, because some sizes differ by fractions of a millimeter. 31.8mm is the common size on modern drop bars. You will also need new bar tape and, on most bikes, longer cables or hoses if you go much wider.
Do flared handlebars make a difference?
In the drops on rough ground, yes - Salsa describe the Cowchipper's 24-degree flare as boosting leverage, stability and comfort. On the hoods and tops, where most beginners ride most of the time, flare changes almost nothing. If you rarely use the drops, it is not the upgrade to spend money on.
How do I know what handlebar is on my bike?
Most bars have the width and clamp size printed or engraved near the stem clamp, under the tape. If not, measure width center-to-center at the hoods, and measure the bar diameter at the clamp with a caliper. Park Tool note the stem's clamp size is usually labeled on the stem itself.
Sources
Specifications come from the manufacturer or the retailer listing, dated. Where a figure is not published, we say so rather than estimating it.
- Ritchey — Your complete guide to gravel handlebars — A bar maker's own definitions: reach is measured from the center of the clamp to where the hoods sit, drop from the center of the top to the lowest point of the drops, and flaring the drops increases the total width — which is why gravel bars list two widths. Flare examples on their own bars run from 12 to 27.5 degrees (accessed September 18, 2026)
- Salsa Cycles — Cowchipper handlebar — A representative gravel bar's published numbers: 24-degree flare, 116mm drop, 68mm reach, 31.8mm clamp, offered from 38cm to 52cm wide, with Salsa's own article noting the widths are measured at the hoods (accessed September 18, 2026)
- Park Tool — Handlebar removal and installation: drop bars — The published procedure: the bar diameter and the stem clamp diameter must match and should be measured with a caliper because some sizes differ by fractions of a millimeter; photograph and measure lever positions before unwrapping; set bar roll and lever position identically on both sides before final torque (accessed September 18, 2026)
- Park Tool — Torque specifications and concepts — Published torque figures for common bicycle fasteners and why over-tightening is the usual failure (accessed August 11, 2026)
- Park Tool — Handlebar tape installation (drop bars) — The published wrapping procedure: direction of wrap, overlap, and finishing at the stem (accessed August 18, 2026)
Read next
Best Bike Bar Tape
The part of the handlebar you actually touch, and the cheapest change you can make to it.
See the tape picksBike Fit Basics
Numb hands and sore shoulders are usually fit, not the bar. Rule that out first.
Read the guideBike Upgrades to Skip
A new handlebar sits close to this list for most first-bike owners. Here is why.
Read the guideBest Gravel Bikes for Beginners
Every bike here comes with a bar the maker sized to the frame. Start there.
See all seven picks