How to Assemble a Boxed Bike
Your bike arrives about 85% built. Here is the other 15%, in order, with the four checks that decide whether it is safe to ride down the street.
How this is funded: we earn a commission if you buy through our links, at no extra cost to you. It never changes which bike we recommend, and we will tell you plainly when we would skip one. Full disclosure.
Nearly every bike bought online arrives part-assembled in a flat box: frame, drivetrain and rear wheel built, and the handlebar, front wheel, saddle and pedals loose. Finishing it is a genuinely doable job, and it is also the point at which a cheap bike becomes either a good bike or a dangerous one.
Work through this in order. The order matters — several steps are much harder if you have already done a later one.
Before you open anything
- Photograph the box. If there is shipping damage, you want the evidence before you cut the straps.
- Keep the box for a week. Returning a bike without it is significantly harder.
- Clear a space and find the small parts bag. It contains the bolts, reflectors and usually the pedal wrench.
- Do not cut the zip ties around the frame until the parts they hold are supported. Loose forks and brake calipers scratch paint on their way to the floor.
Step 1: handlebar into the stem
Undo the faceplate bolts, sit the bar in the clamp, and put the faceplate back with all four bolts finger-tight. Now set the angle: the flat section of the drops should be roughly horizontal, or angled very slightly down toward the rear wheel.
Tighten in a cross pattern, a little at a time, until the gaps at the top and bottom of the faceplate are equal. That even gap is not cosmetic — it is what tells you the clamping force is spread across the bar rather than concentrated at one edge.
Torque matters here. Handlebar clamp bolts are typically in the region of 5–7 Nm, and the figure is often printed on the stem itself. Park Tool publish the general torque specifications; use the number on the part when there is one.
Step 2: front wheel and brakes
- Remove the plastic spacer between the disc brake pads. It is there to stop the pads closing during shipping, and riding with it in place is not possible — but pulling the brake lever before you remove it is, and that is how pads end up jammed together.
- Fit the wheel. With the bike upside down or in a stand, guide the rotor between the pads and seat the axle fully in the dropouts. Do the quick release or thru-axle up firmly — a quick release should need real effort with the palm of your hand at the last 90 degrees of the lever.
- Spin the wheel. A faint tick usually means the caliper needs aligning. Park Tool publish the procedure: loosen the two caliper mounting bolts, squeeze the brake hard, hold it, and retighten. That centers the caliper over the rotor.
- Squeeze both levers hard. They should stop well short of the bar and hold the bike solid when you push it. If they feel soft or the pads rub, the fix is here.
Step 3: seatpost and saddle
Grease the seatpost lightly before it goes in — an ungreased alloy post in an alloy frame can seize permanently, and that is an expensive way to learn.
Set the height roughly first: sitting on the saddle with your heel on the pedal at the bottom of the stroke, your leg should be straight. When you move to the ball of your foot there will be a slight bend. Do not go past the minimum insertion line marked on the post, ever.
Fine-tuning comes later, once you have ridden it — our fit guide covers the real method.
Step 4: pedals, and the one that catches everyone
Pedals are marked L and R. The right pedal has a normal thread. The left pedal is reverse-threaded — it tightens counterclockwise. This is not a manufacturing quirk to work around; it is deliberate, and forcing a right pedal into a left crank destroys the crank thread.
- Grease the threads.
- Start both by hand. If it does not thread easily with your fingers, stop and check which side you are on.
- Remember the direction with the front of the bike: on both sides, the pedal tightens toward the front wheel.
Step 5: tires, gears and the final check
Inflate the tires to the pressure printed on the sidewall as a starting point, then work out your actual pressure from your weight and tire width — the sidewall number is a maximum, not a recommendation. If the valves are unfamiliar, Presta valves are explained here.
Then run through the gears with the bike in a stand or held up. Shifting that hesitates or skips after shipping is usually cable settle or a knocked derailleur hanger — indexing is a ten-minute fix, and a visibly bent hanger is a shop job.
The four checks before you ride, none of which are optional:
- Brakes. Squeeze hard, push the bike. It should not move.
- Bars. Grip the front wheel between your knees and twist the bars. Nothing should rotate.
- Wheels. Lift each end, spin, check for rub and wobble. Squeeze pairs of spokes — none should be obviously loose.
- Every bolt. Go round the whole bike once with the hex keys. Stem, seatpost, saddle rails, bottle cages, rotor bolts, brake calipers.
Then ride a slow lap of an empty car park, using each brake and every gear, before you go near traffic. And re-check the bolts after the first hundred miles — cables stretch and everything settles in the first few rides.
What the job needs
Three things this specific job is much worse without. Everything else can wait until something breaks.
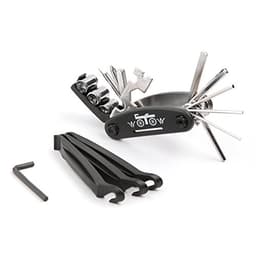
WOTOW 16-in-1 Bike Repair Tool Kit
Covers the hex sizes on the stem, seatpost, saddle and bottle cage bolts in one folding tool - the cheapest way to have the right key in your hand.
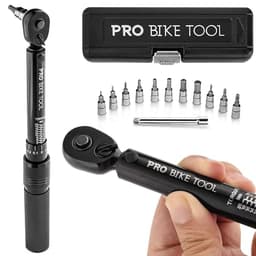
PRO BIKE TOOL Torque Wrench Set
Stem, seatpost and rotor bolts all publish a torque figure. This is the tool that turns those numbers into something you can act on.
$59.99 · View on AmazonPrice as of October 21, 2026. #ad How we’re funded
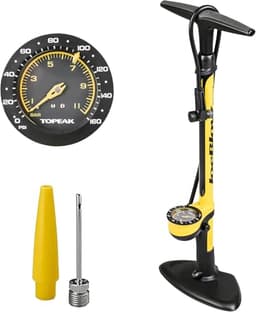
Topeak JoeBlow Sport III
A boxed bike arrives with soft tires and no gauge is guesswork. A floor pump with a dial is the difference between the right pressure and the sidewall maximum.
We have not ridden or tested these — every specification comes from the manufacturer or the retailer listing, dated. Here is exactly what we do instead.
When to stop and hand it over
There is no shame in this and it is much cheaper than the alternative — here is what shops actually charge, from their own menus. Take it to a shop if:
- A brake lever pulls to the bar and adjusting the cable does not fix it.
- The derailleur hanger looks bent, or the rear derailleur sits at an angle.
- A bolt will not tighten, or the threads feel gritty going in.
- The wheel wobbles side to side as it spins.
- Anything creaks under load that you cannot trace.
A safety check costs a fraction of a full build, and it is the single best money a first-time online buyer can spend. After that, the ongoing maintenance is genuinely small.
Questions people actually ask
How long does it take to assemble a bike from a box?
Allow two hours for a first attempt, and do not start at ten at night. The physical assembly - bars, front wheel, saddle, pedals - takes about forty minutes. The rest is the part that matters: checking brake adjustment, gear indexing, wheel tension and every bolt on the bike. A shop mechanic doing this daily takes about an hour, and they are not learning as they go.
What tools do I need to assemble a boxed bike?
A set of hex keys covering 2 to 8mm, a 15mm pedal wrench or 8mm hex depending on your pedals, and grease. A torque wrench is the one item worth adding: stem, seatpost and disc rotor bolts all have published torque figures, and both overtightening and undertightening them are real failure modes. A floor pump with a gauge is the fourth thing, because a boxed bike arrives with soft tires.
Is a bike that arrives in a box already assembled?
Mostly. The frame, drivetrain and rear wheel are built and the gears have usually been set up at the factory, which is where the 85% figure comes from. What is left is the handlebar into the stem, the front wheel in, the saddle and seatpost, the pedals, and every adjustment that had to be undone to fit the bike into the box - including the brakes, which are often the least finished part.
Do I need a torque wrench for a bike?
For an aluminum bike with an aluminum stem you can get away without one if you are careful and check bolts regularly. It becomes genuinely important on any carbon component - handlebar, seatpost or steerer - where overtightening crushes the part and undertightening lets it slip. Torque figures are usually printed next to the bolt, and Park Tool publish the general specifications.
How do I know if my new bike is safe to ride?
Four checks before the first ride. Squeeze both brakes hard and try to push the bike forward - it should not move. Stand over the front wheel, grip it between your knees and try to twist the bars - nothing should rotate. Lift each end and spin the wheels - they should spin freely and not rub. Then take a slow lap of a car park testing the brakes and every gear before you go near a road.
Should I get a bike shop to check an online bike?
It is cheap insurance, and worth it if anything about the build felt uncertain. Many shops offer a safety check for a fraction of a full build price, and they will spot the things a first-timer misses: a bent derailleur hanger from shipping, a loose spoke, a headset that is not properly seated. If the brakes did not feel right or a bolt would not tighten, do not ride it - take it in.
Sources
Specifications come from the manufacturer or the retailer listing, dated. Where a figure is not published, we say so rather than estimating it.
- Park Tool — Complete bike assembly checklist — The professional sequence for assembling a boxed bike, from stem and headset through brake and derailleur setup to a final wheel check (accessed August 18, 2026)
- Park Tool — Torque specifications and concepts — Published torque figures for common bicycle fasteners and why over-tightening is the usual failure (accessed August 11, 2026)
- Park Tool — Mechanical disc brake alignment — Caliper alignment and pad adjustment procedure for cable-actuated disc brakes (accessed August 11, 2026)
- Park Tool — Rear derailleur hanger alignment — Why a bent hanger makes indexing impossible to hold, and that alignment is a gauge-and-shop job rather than a roadside one (accessed August 13, 2026)
Read next
Buying a Bike Online vs a Bike Shop
The decision this guide is the consequence of, priced out honestly.
Read the comparisonBest Bike Tool Kits
The hex keys, torque wrench and stand, with live prices.
See the tool picksHow to Adjust Bike Brakes
The step most boxed bikes need, in detail.
Read the guideHow to Index Bike Gears
When the gears skip after shipping, this is the fix.
Read the guide